Caliper – How to take measurements using a vernier caliper
How to take measurements using a slide caliper
Itieffe is pleased to present the guide on how to make measurements using the vernier caliper, a versatile measuring instrument widely used in various sectors, from engineering to metalworking, from construction to the automotive industry. The vernier caliper is known for its accuracy and reliability in measuring linear dimensions, thicknesses, and internal and external diameters.
This guide was created to be a helpful resource for anyone wanting to learn how to properly use a vernier caliper. Whether you're a beginner new to this instrument or a seasoned professional looking to refine your skills, you'll find valuable information to ensure accurate and reliable measurements.
In the guide, we will explore the following key areas in detail:
- Fundamental concepts: We'll start with an overview of the basic principles of the vernier caliper, including its essential components and general operation. Understanding these fundamental concepts is critical to mastering the use of the vernier caliper.
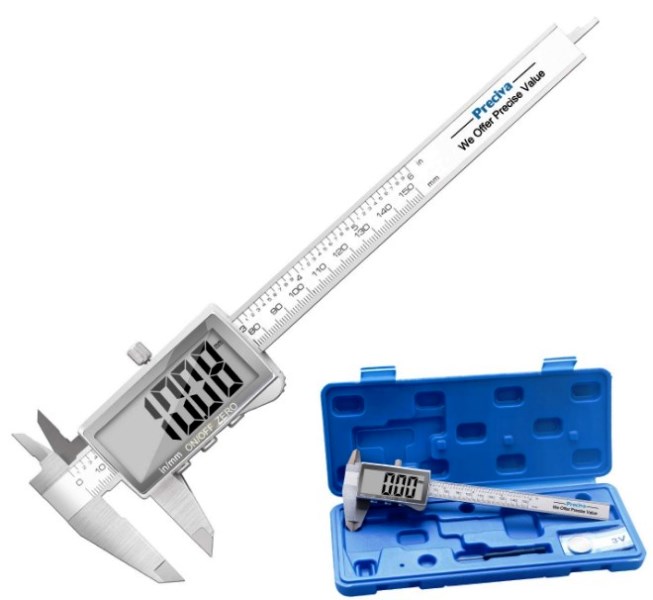
- Types of Vernier Calipers: We will look at the different types of vernier calipers available, including the Vernier Vernier Caliper, Digital Vernier Caliper, and Vernier Vernier Caliper, to give you a complete understanding of the various applications in which they can be used.
- Measurement procedure: We will guide you step by step through the correct procedure for making precise measurements with the vernier caliper. You will learn how to prepare the caliper, place it on the surface to be measured, and read and interpret the readings.
- Common mistakes and how to avoid them: We'll explore common mistakes that can occur when using vernier caliper and give you tips on how to avoid them. Precision is essential when it comes to measurements, and you will understand how to keep errors to a minimum.
- Maintenance and conservation: Your vernier caliper is a precision instrument, so it is essential to know how to maintain and store it in excellent condition.
- Special applications: Finally, we will explore some special applications where the vernier caliper is widely used, for example in measuring thicknesses of thin materials and verifying the dimensions of mechanical components.
We are confident that this guide will provide you with the knowledge you need to use your vernier caliper effectively and accurately. Whether you are working on engineering, manufacturing, or quality control projects, a proper understanding of how to use the vernier caliper is essential to ensuring success in your precision measurement efforts.
How to take measurements using a vernier caliper
The vernier or cursor gauge is a very practical and versatile tool, used by an infinite multitude of technicians (but not only).
Its characteristics make it very ductile in various applications.
Today there are various types and the digital one has almost completely supplanted the mechanical one.
On the back of the gauge, sometimes, there are tables of practical utility in the workshop.
The caliber is made of Invar stainless steel which has non-deformability and wear resistance qualities.
The vernier represents the main characteristic of the traditional vernier caliper, because it allows to measure lengths with approximations less than one millimeter.
The term vernier derives from the name of its inventor, the Portuguese Pedro Noῆez.
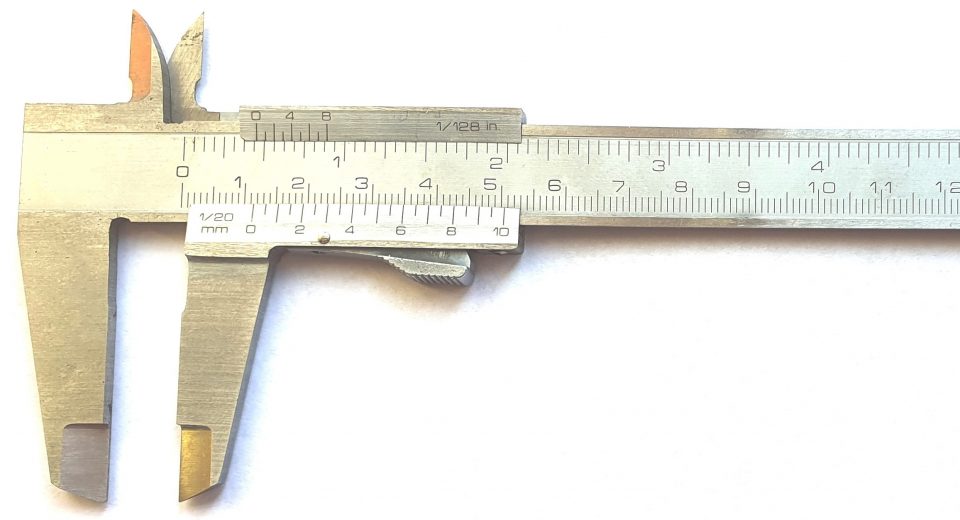
The main parts of the vernier caliper are described in the following figure:
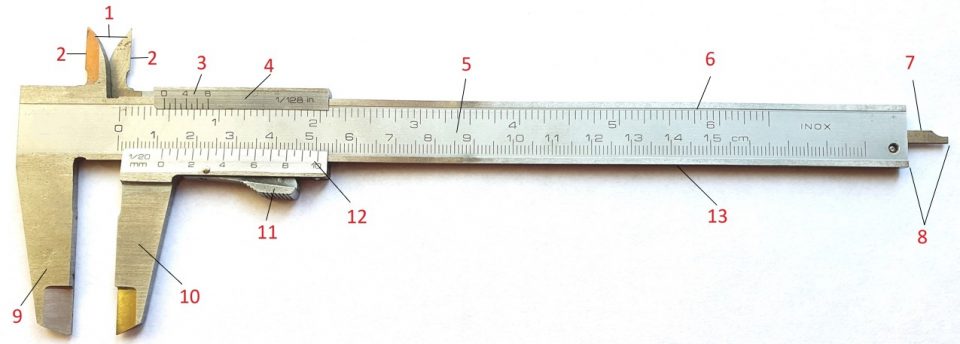
| 1 - beaks for internal measurements | 8 - contact surface depth measurements |
| 2 - internal blade surfaces | 9 - fixed spout |
| 3 - vernier scale in inches | 10 - movable spout of the cursor |
| 4 - cursor or cursor | 11 - cursor outlet button |
| 5 - fixed rod | 12 - vernier scale in millimeters |
| 6 - graduated scale in inches | 13 - graduated scale in millimeters |
| 7 - rod for depth measurements |
First check if the gauge is zeroed (the jaws match and the zero of the vernier coincides with the zero of the scale of the fixed rod).
To carry out a measurement, proceed as follows:
- insert the object between the fixed (9) and movable (10) beak of the caliber and make it adhere perfectly to it;
- release the outlet button (11) so that the cursor (4) locks;
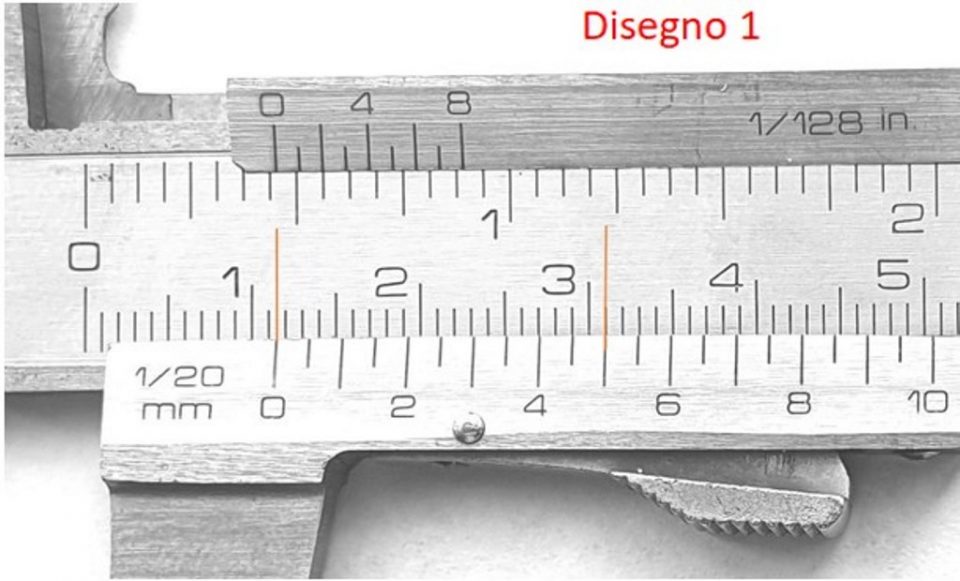
- read the distance between the 0 of the fixed rod (5) and the 0 of the vernier (12) (in drawing 1 it is greater than 11 mm);
- read on the vernier scale (12), where one of the notches is perfectly aligned on the notch of the fixed rod (5) (in drawing 1 it corresponds to 0.50 mm);
Reading done 11,50 mm
Another measurement can be done with the beaks for internal measurements (1) by inserting the internal blade surfaces (2) inside the object (suppose a hole).
Another thing can be done with the rod for depth measurements (7) using the contact surfaces (8) as indexes.
Suppose that in both cases the following measurement is obtained:
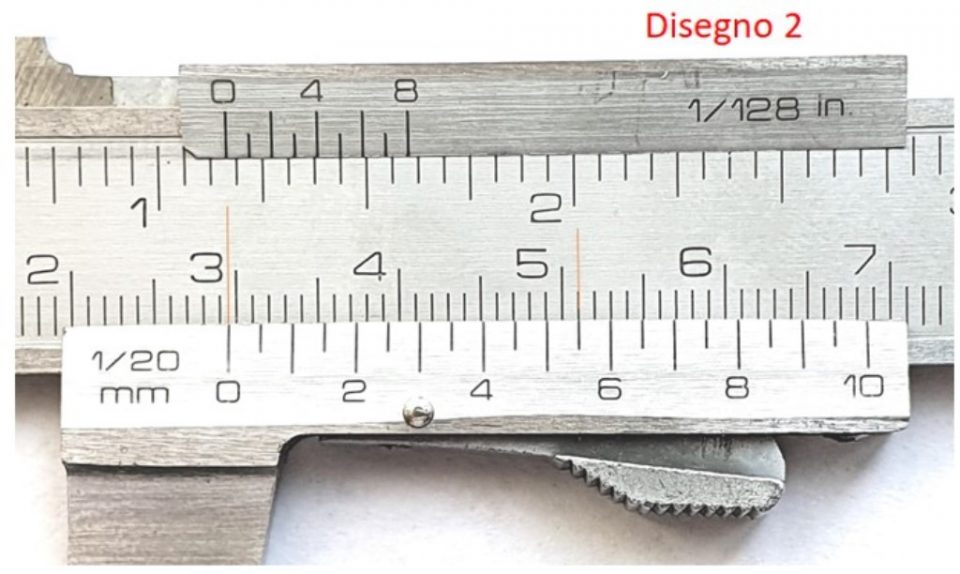
Let's read:
- distance between the 0 of the fixed rod (5) and the 0 of the vernier (12) is greater than 29 mm;
- vernier scale (12), which perfectly aligns on the notch of the fixed rod (5) corresponds to 0.55 mm);
Reading done 29,55 mm